Thursday 6 December 2018

Do It Yourself historical rope drum (III).

Today I´m bringing you the third part of my "Do It Yourself historical rope drum" project. You can check the first part HERE and the second one HERE.

This is how the drum looked like at the end of the second part:


©David Valdés


As I wanted to emulate historical designs, I had a very clear idea since the very beginning of this project: to decorate the shell with tacks, a normal procedure centuries ago (and a necessary one because, when bending the wood to form a cylinder, we get a join that needs to be reinforced for the shell to stay in shape. It was also a decorative element and, because of the different patterns, it was also used to identify makers). So, looking for inspiration, I searched in the iconography and surviving historical drums:


"The nightwatch" (Rembrandt)


"Boy with a drum" (Rembrandt)


American Civil War drum


American Civil War drum


 American Civil War drums belonging to William F. Ludwig II


British long drum (1714-1727). National Music Museum. Here you can see the seam where the shell overlaps over itself and how it is reinforced with tacks.


Bass drum by William Kilbourn (Albany, New York). 1864-1869. National Music Museum


Trying not to screw it up or irreversibly damaging the shell, I did some preliminary tests on a board:


©David Valdés


Once I was confident enough, I got a compass and gridded paper, where I draw several concentric circumferences (using the vent hole as the centre). I then marked their perimeters with equidistant points. Those points would be where I would hammer the tacks. Once I finished the template, I fixed it on the shell with masking tape (so as not to damage the finish), centering it on the vent hole and aligning the "north/south" diametral line with the seam of the outer layer of the shell, which is also the symmetric axis for the snare bed and the vent hole. This way, all the elements would be centered and symmetrical (even the snare strainer).


©David Valdés


I got some nice brass tacks to harmonize with the rest of the elements of the drum but, before starting with the hammering, I had to cut them, as they were longer than the thickness of the shell (and I didn´t want them to go through it). As I always do, once cut I hammered their tips so they don´t crack the wood.


©David Valdés


Using the template, the next job (very boring, by the way...) was marking the points were I would hammer the tacks.


©David Valdés


Once done, I removed the template, revealing the marks. With this preparatory job done, hammering the tacks was a piece of cake.


©David Valdés


So, there goes the first circumference (12 tacks):


©David Valdés


The second one (24 more tacks):


©David Valdés


The third one (36 more):


©David Valdés


And, finally, the fourth one (48 more):


©David Valdés


Once I finished the central "rosette", I considered attaching a brass grommet to the vent hole, but checking the iconography I saw it wasn´t a feature present in historical drums, so I got rid of it.

©David Valdés


I completed the design (using the template and technique already described) with four more "rosettes", this time using different tack sizes to make them look like flowers.


©David Valdés


And here we have, 172 tacks later, the whole thing finished:


©David Valdés


The next thing I did was attaching a snare strainer (an 18th century replica I got at Cooperman which I gold plated to match the other elements -the original piece was chromed-):


©David Valdés


Using my angle mat, I marked a diametrical point to that of the strainer...


©David Valdés


...so I could attach the butt bolt (also by Copperman, and also gold plated).


©David Valdés

Here you have a photo of the shell, counterhoops and heads ready to get roped (bare in mind those aren´t the heads actually on the drum, as they feature aluminium flesh hoops, which are not historical. The drum does now feature goat heads mounted on wooden flesh hoops).


©David Valdés


I´ll show you the complete drum in a future article. Do you like this kind of finish?, do you consider it historical enough? 😉


…et in Arcadia ego.
© David Valdés

Wednesday 17 October 2018

XIV Mislata International Percussion Festival

Next Saturday, October 20th, I´ll be involved in a masterclass invited by the XIV Mislata International Percussion Festival (Valencia-Spain). It will take place at Liceu de Música de Mislata between 10:00 and 14:00. I´ll talk about the new Spanish edition of "Método de Movimiento para Marimba", will deal with the technical aspects of the famous 590 exercises, will work on musical issues and will play and work repertoire with the students.

There will also be masterclasses by fantastic percussionists: Javier Eguillor on timpani, Noel Savón on Afro-Cuban percussion, Alejandro Galarza on teaching techniques, Aarón Cristófol on flamencode, David de Cubas on percussion coaching and Xaloé Marí on accesory percussion. There will also be concerts by Kolier Percusión and the Ensemble de Percusiones de la Universidad Autónoma de Nuevo León (Mexico). 

As you can see, it´s a very atractive festival, which I strongly reccomend. Here are some photos of the oficial brochure and a link should you want to get more information or get enroled: www.liceudemusicamislata.com.


Looking forward to see in you Mislata! 


…et in Arcadia ego.
© David Valdés


Friday 8 June 2018

Do it yourself "rute".

In ten days, rehearsals for Mahler #6 will start. I´ll be in charge of the bass drum and, as you may know, there´s a European tradition which ties together this instrument and the rute. A rute is a bunch of twigs used to hit the bass drum shell, resulting in a very peculiar sound. Its origins go back to the davul (you can check my article HERE), an ancestor of the BD, played using a mallet in one hand and a very thin "spaghetto shaped" twig in the other. This tradition continued with the bass drum, and that sound and way of playing lived on (still lives on) in certain parts of Europe. Mahler, Strauss, Stravinsky..., are composers who wrote for rute.  

As I prepare for the rehearsals, I want to have as many options as possible. I own a pair of large rutes I got for almost nothing (which you already heard when the Asturias Symphony last played Haydn´s "Military Symphony"), plus some Promark Hot Rods and Vic Firth Rute505. Looking ahead, just in case the large ones produce too much sound or the others too little, I decided to make something in between so I can have all the colours in a complete palette. I got, for €2 each, a couple of these in the decoration/garden aisle of a store:


© David Valdés


Lenght and thicknes were perfect for a rute.


© David Valdés


I put both together and saw the resulting one. They were originally 80cm (31.5"), so I got two 16" bunches (almost), a very common stick lenght. Perfect!


© David Valdés


I also got some electrical tape (€1), which I used to make a "handle" and keep everything together. Voilà! A perfect Mahler rute.


© David Valdés


As you can see, there´s nothing new under the sun. All those ubiquitous trendy and cool sticks you can see on cajons, drumsets..., are something which has been around for centuries. Obviously, you can use them on everything you fancy: imagination and taste are the only limits.

For as little as €4,05 I made some very nice rutes. Will that ridiculous price keep you from experimenting? 😉 Please tell me about your experiences with this kind of beaters. I promess to upload a video in a week or so.


…et in Arcadia ego.
© David Valdés

Friday 4 May 2018

"Armonica a bicchieri" in Donizetti´s operas.

There´s a video which has become quite popular among percussionists in the last few days. It features a rehearsal of "Lucia di Lammermoor" at the Metropolitan Opera; more precisely, the famous "mad scene" ("Il dulce suono...", act III, scene 2). The curious thing about it is the historically informed approach, as the famous flute solo is played on the instrument it was originally scored for: the "armonica a bicchieri" (harmonica made of glasses). The information you are about to read has been taken from the fantastic "The Timpani and Percussion Instruments in 19th Century Italy", by Renato Meucci, a book I wholeheartedly recommend.


The "armónica a bicchieri" is an instrument regularly present for more than a decade solely at the Teatro San Carlo in Naples. It´s made of musical glasses, rubbed with the fingers, and the most reliable description can be found in a treatise of 1846 by the Neapolitan Vito Interlandi:

There are different types, but that in use at the moment is composed of two octaves of glasses set in a kind of box adapted for this purpose, and tuned with more or less water in the glasses that are of different sizes, from C below the staff to C above it, an further still to high F, going beyond the two octaves according to the maker. The melody is played by the right hand and the bass by the left. The tips of the fingers, wetted with the water, rest lightly on the rim of the glass, and going round its circumference draw out the sound. The famous Franklin raised the status of this toy to an instrument in 1763. 

Interlandi adds that, at the moment his treatise was published (1846), the instrument was still used occasionally in the theatre since "...space must be left near the harpsichord for placing special instruments such as the harp, musical glasses, or others, when they are needed".

There are two Donizetti operas, both written for the Teatro San Carlo, in which the musical glasses are explicity requested: "Elisabetta o Il castello di Kenilworth" (1829) and "Lucia di Lammermoor" (1835). At least since 1833, among San Carlo´s orchestra musicians was an "armonica" player, the same Domenico Pezzi, for whom the Lucia part was written, but who, at the last moment, was not able to play it; thus the substitution in extremis that assigned to the flute one of the most famous solos in the opera repertoire of the 19th century.

According to Gabrielle Dotto, in his article "Voci celesti e scelte critiche", included in a hand bill of a production of "Lucia" by La Scala, in the autograph manuscript, in the particella for the armonica, there´s a note stating "cancellata ma ancora ricostruibile" ("cancelled, but still redoable"). Pezzi had rehearsed the part together with Taccchinardi-Persiani (the soprano who premiered the opera), but he was already having problems with the management of the Theatre, as another armonica part had to be cancelled in a previous ballet: "Amore e Psiche" (the part, profetically, being given to the flute). The Teatro San Carlo fired Pezzi stating he was not reliable, as cancelling the part in the ballet was due to him leaving the city without previous notice. On the other hand, Pezi, who was paid per gig (a pioneering freelancer), declared that the Theatre, in finacial difficulties, fired him so as to save on his emoluments. When asked by the Theatre what to do after firing Pezzi, Donizetti decided to substitute the armonica with "una coppia di flauti" (a couple of flutes). So, on September 26th, 1835, the night of the premiere, the armonica didn´t sound.

I´d like to add that the term "armonica" was also used to name an instrument made of small glass strips, played with mallets or, later on, with hammers operated by a keyboard ("armonica a tastiera"). These instruments had singular success in Italy, as proved by several examples conserved in private collections.

So, dear flutists, you now know this solo belongs to us 😉. 

I have played "Lucia di Lammermoor" several times, but no armonica was used due to it not being available. Wold you have imagined something like this?, would you like to play the armonica part? Tell me your thoughs.


…et in Arcadia ego.
© David Valdés

Wednesday 2 May 2018

"Method of Movement for Marimba" already available in Spanish.

Last April 9th was a very special day: after very hard work, effort and excitement, "Método de Movimiento para Marimba" (L. H. Stevens) was, at last, published. This is a long awaited project into which both Leigh and I have put our best. My job? Translating into Spanish the most important marimba book ever written.


© David Valdés


Everyboy knows the importance of the contributions to the marimba world made by Leigh Howard Stevens and how his method for holding and manipulating four mallets revolutionized the percussion world: "MOM" is a reference for marimbists around the world since it was first published in 1979. The way he holds and moves the mallets, how he wraps them, the use of rigid birch handles, one handed independent rolls, the different stroke types, the use of tuneable resonators along the entire range of the instrument, super wide keys, the design of height adjustable frames, the works he has written or others have composed for him, his books, records..., have made of Leigh Howard Stevens an omnipresent figure and a reference for all marimba students, players and teachers.
 
I was lucky enough to be a student of his at the Royal Academy of Music, where I got my "Postgraduate Diploma in Timpani and Percussion". After leaving London, I got in touch with him and suggested the project. Taking into account that his ideas have left a special mark in Spain, that the Spanish speaking market is made of 500 million people, that there are countries in America with an important marimba tradition (Mexico,Guatemala...) and that Spanish was one of the major languages into which "MOM" was still not available (it´s been published in French, German, Italian and Japanese), Leigh decided to go for it (I have to proudly say that his literal words were "I can´t think of anyone else better than you for this project").

"Method of Movement for Marimba" has been reprinted and re-edited several times during its existence. It was 25 years old in 2004, and that was celebrated with a revised and expanded commemorative edition. It was this 25th anniversary edition the one we used as the basis for the Spanish version.


© Mostlymarimba


Translating Leigh is quite a hard task, as his sense of humour, double meanings and jokes have no correspondence in Spanish, but truly yours enjoys the same kind of humour, making the Spanish version a very true to the essence text.

Another trouble I faced (a big one) was that, contrary to English, which can express thoughts using very few words, Spanish needs complements, subordinates, conjugations... Spanish is way more complicated in terms of grammar than English is. This expands the text considerably, resulting in a total mess when it comes to layout. We had to keep the design as close as possible to the original, and that, considering we had a much larger text, was a total challenge..

So, I started with a mere translation, taking notes, marking possible mistakes...


© David Valdés


I even used post-it notes to write down things, specific doubts, questions to be made to the Spanish Academy...


© David Valdés


After that initial work, I printed galleys so I could check how everything was going:


© David Valdés


I used those galleys to correct mistakes, check layout, take notes...


© David Valdés


The next step was a proof print. I have to say this edition has a new feature the previous ones don´t: spiral binding. A book containing 590 exercises is going to be used on a music stand most of the time, so it must be convenient for that purpose. The standard classical binding was substituted with a spiral one. I´m sure you will like this improvement.


© David Valdés


Finaly, the press did its job and "Método de Movimiento para Marimba" is now available. 


© David Valdés


Working on this project has been amazing... I have put my body and soul into it. I can proudly say everything in it, ABSOLUTELY EVERYTHING, is the result of my own efforts. From the initial idea to the translation (which I tried to make as neutral and panhispanic as possible, without local expressions, keeping the original spirit, humour and style of the author, true to the original and, at the same time, tryining not to make it sound "like a translation", but like something a Spanish speaking person would have written), from the layout to the redesign of some photographs (those original archives containing text had to be modified), from asking the Spanish Academy to the work with InDesign (from scratch... I had to get a Mac for this job, learn how to use the software, pay a subscription, learn how to layout...). It was a hard job. Extremely hard... But, I have to say it´s been a very rewarding one. I would have never imagined, when I started playing marimba at the age of 16 that, not only I would end up studying with the author of the book I was using in my lessons, but that I would be the translator of the most important book ever writen for our instrument.

I got help from Sofía, my wife, who already knows the book by heart because of the many times she has read it in search of mistakes. From Diego, from whom I borrowed a Mac, as all the fonts, links and archives were useless in a PC. From Maite, who tought me how to use InDesign from scratch and was extremely helpful. From Jorge, a physicist and a former student of mine, who checked that all the scientific terms and expressions were ok. From David, the person in charge at Marimba Productions Inc. and my guardian angel that side of the pond, who corrected all the details (sometimes microscopic) both in the book and on the website. From Leigh, who trusted me for this project.


© David Valdés


"Método de Movimiento para Marimba" can now be purchased at mostlymarimba and music stores.

Is this good news? Do you know any marimbist who could benefit form this edition? Ask me any question you may have and I´ll be happy to answer them.

   
…et in Arcadia ego.
© David Valdés

Monday 26 March 2018

Restauration of a rope drum.

While building my own 16"x16" historical rope drum ("DIY historic rope tension drum I", "DIY historic rope tension drum II" and future articles) I came across an already made 14"x12" drum (at a very good price), so I couldn´t resist the temptation and got it. Said drum was a Gonalca in a reasonable condition, but in need of some work to make it sound and look to its full potential. As it happens with almost all the projects I show you in my blog, I ended up working on quite a few of them at the same time.


© David Valdés


As always, the first thing I did was stripping it down to pieces.


© David Valdés
© David Valdés


When removing its goat heads I realized something: instead of being tucked the traditional way, they are fixed with staples to the flesh hoop! I have never seen that before.


© David Valdés


The bearing edge, apart from dirty, was in perfect condition (and rounded, as one would expect in this kind of drums. No fancy angled cuts).


© David Valdés


The interior was inmaculate, though somewhat rough.


© David Valdés
© David Valdés


The butt end and the snare strainer were ok, but the latter was missing the strainer (no worries... I was planning using other parts).


© David Valdés
© David Valdés


The snare bed was also perfect, as you can see in this photo.


© David Valdés


It´s very wide, and it runs between the two green marks on the table:


© David Valdés


This is the bare shell.


© David Valdés


It featured kind of a "kitchen table finish", so that was the first thing I got rid of.


© David Valdés


Using grade 50 sand paper I made the shell return back to its "natural" state.


© David Valdés


I repeated the process with finer grades (both in and out) untill it was smooth like a baby bum. I have to say this shell is made of birch, and working with this wood is a pain you know where, as it produces foam-like shavings, which get everywhere, making working with this wood a real hassle.


© David Valdés


I then applied some tung oil to the interior, letting it dry for 24 hours before applying the next coat. See the difference between the treated interior and the raw exterior.


© David Valdés


© David Valdés

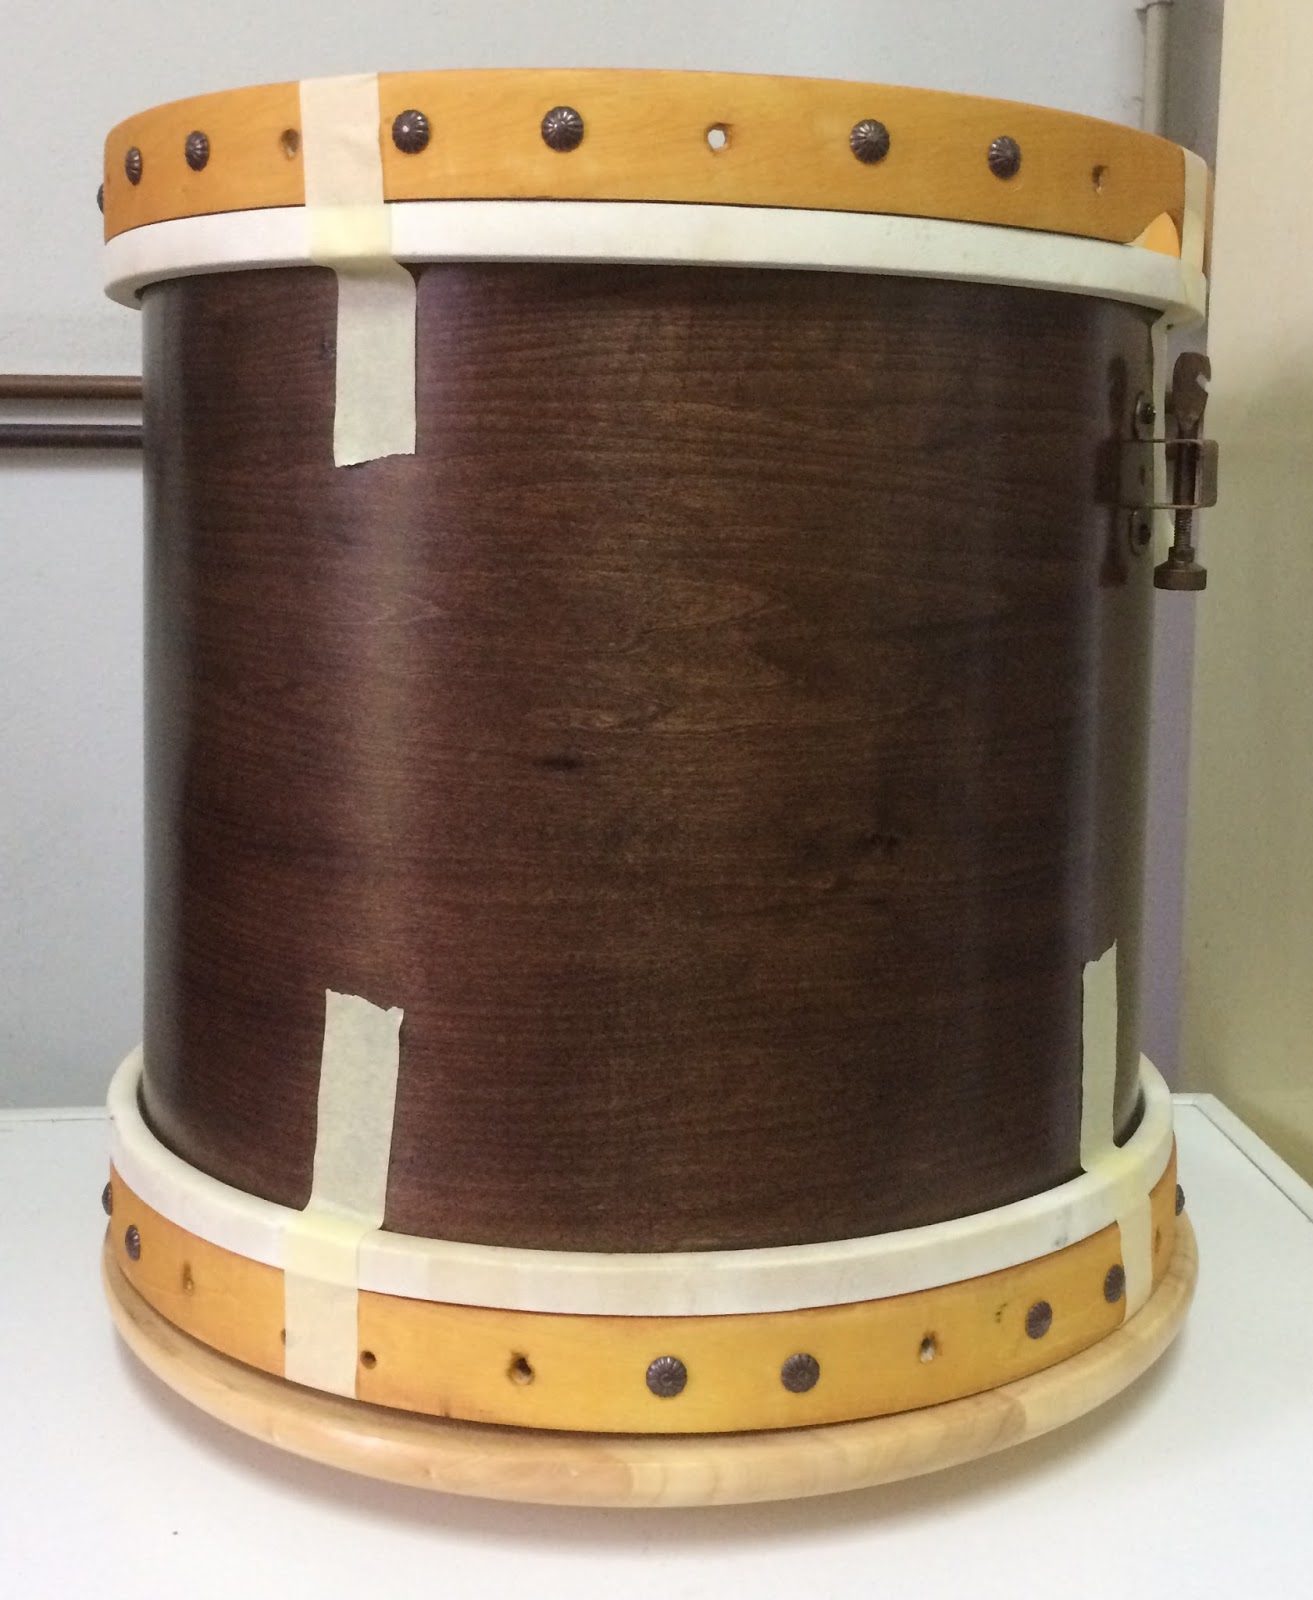
I then went back to an old friend: chesnut dye. The first photo shows the process half-way, the second one shows the shell recently finished (still wet), and the third photo shows the shell one once dry and worked with 000 grade steel wool.


© David Valdés
© David Valdés


© David Valdés


Once done, I wax finished it (also using an old friend). This is the final result after 10 coats.


© David Valdés


Next thing was attaching the butt end and the snare strainer. In order to match the new look, I ordered aged brass parts:


© David Valdés


© David Valdés

The shell was done, so I started working on the hoops, which had some problems with the laminate.


© David Valdés


© David Valdés


I glued them and used clamps to keep them in place while drying.


© David Valdés


© David Valdés


Next thing I did was sanding them to get the new finish. I used tung oil, and applied ten coats.


© David Valdés


Then I had the idea of decorating the hoops somehow. I haven´t seen iconography showing ornate hoops, but I wanted to make my drum look more "baroque", so I wasn´t afraid to go the overelaborate way. My first idea was pyrography, but I soon abandoned, as I never did anything like that. Then I got this idea while wandering through the aisles in Leroy Merlin:


© David Valdés


These tacks are longer than the hoop thickness, so I had to cut them:


© David Valdés


© David Valdés


Here you can see an original and a cut one:


© David Valdés


The problem is that they can crack the wood if hammered in with this new end, so I hammered the tips to avoid surprises. After some tests I decided I would use two of them between holes. I measured, marked and prepared the hole with a brace:


© David Valdés


Then it´s just a matter of hammering them in along the perimetre and being careful with the fingers:


© David Valdés


This is the final result:


© David Valdés


I also added a carry hook (missing in the original drum) so I can use a sling. It was also ordered in an aged brass finish.


© David Valdés


Now, let me tell you... These hoops allow 4mm diametre ropes to pass through. The rope I used in the drum I showed you in previous articles is 5mm. Hemp rope is sold in 200m lenght rolls, so I would have to buy another 200m of a different diametre just for this drum (and that´s lots of rope...). So, I decide to "standarize" all the holes in my rope drums: using a bit and some clamps, I enlarged these holes so I could use the same rope in all of my drums, thus not needing to buy hectometres of different diametres. Apart from enlarging the holes, this process also improved their look, as they were a little bit battered due to the pressure the rope made on them.

Other thing: these holes are drilled perpendicular to the hoop (that´s how I got them), something I don´t like, as it complicates the passing of the rope, thus the tensioning. You may remember the hoops on the drum I already showed you in previous articles: the were drilled at a 20º angle. That facilitates the rope passing through, makes the tensioning easier and doesn´t damage the holes. I would have loved modifying them, but I don´t have the tools to drill at an angle other than 90º.


© David Valdés


Here we have both the shell and hoops finished:


© David Valdés


I then moved to making the leather ears responsible of tensioning the rope (the old ones didn´t match the new look and were not very practical). I chose some light colored leather, as it would match the hoops and contrast the shell. On the contrary, I chose some dark colored leather thread, as it would contrast the ears and match the shell. This way the whole design would be homogeneous and nice (or, at least, it would match my own taste...). I got everything at Curtidos Carrasco, a local shop worth a visit because of the colours, smells, stock, the kindness of the owners... A time capsule.


© David Valdés


I sanded the back of the sheet it to improve grip:


© David Valdés


Here you can see half sheet sanded, half sheet as I got it:


© David Valdés


I used a model to mark the leather and cut it:


© David Valdés


© David Valdés


© David Valdés


Then I used this tool I don´t know its name (but it´s super fun to use) to make a decorative fillet:


© David Valdés


© David Valdés


I used a puncher to make holes for the thread:


© David Valdés


© David Valdés


I then used a special needle and flat leather thread to sew the ears in place (I wasn´t looking for perfect stiches: I was looking for what I saw in old drums):


© David Valdés


© David Valdés


I made ten ears and, when done, it was just a matter of assembling the whole thing (I will show you how to do it in a future article).


© David Valdés


I made the snares with natural gut I got (no pun intended) at Baena Sonido (I´m learning how to make my own, and already have everything I need to make them).


© David Valdés


After sanding them to take off the lacquer they were covered with, I put them in water to make them "workable" with (I know, the bowl looks funny... 😊):


© David Valdés


Once it was wet and flexible, I made a bowline knot around the butt end and started passing the gut across the resonant head:


© David Valdés


© David Valdés


© David Valdés


I made four passes, secured the end with another bowline knot and let them dry.


© David Valdés


With the rope tight, the drum was finished and ready to be played. I will post a demo video in a future article, but I must say it sounds extremely well, so loud and articulate it could blow a whole regiment out. This drum is ideal for traditional repertoire and early music.

Here you can see some decent photos:


© David Valdés


© David Valdés


© David Valdés


© David Valdés


© David Valdés


© David Valdés


© David Valdés


© David Valdés


© David Valdés


© David Valdés


I promess I will show you how it sounds soon. Do you own a rope drum?, have you made it yourself?, have you repaired one? Leave your comments!.


…et in Arcadia ego.
© David Valdés